
Customers using Nexa Base or Nexa Pro can use the Projects module to view and prepare production for any project that they have created.
Click Projects in the sidebar to access a project.
Accessing a project
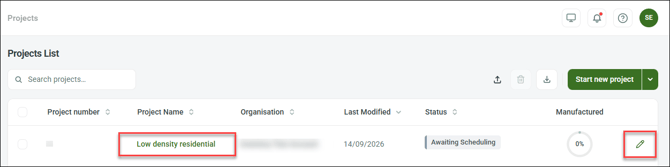
In the Projects module, click a project's name to access its page. (Click the pencil icon to update the project and customer details).
Project page overview
The project page opens to the Info screen.
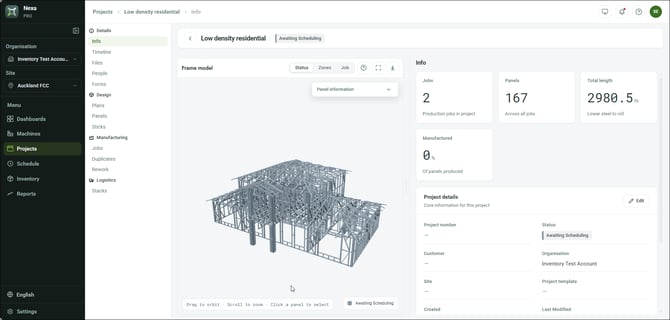
Use the project navigation pane to access a section.
| Click... | To... | |
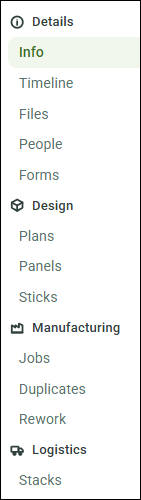 |
Info | view project totals; view/edit project and customer details and add workflows |
| Timeline | view dates, people, status for each project milestone | |
| Files | add design files and other file types (about managing files) | |
| People | add/remove users to/from the project | |
| Forms | (for Nexa Pro customers) add a QC or other form to the project (about creating forms) | |
| Plans |
view, manage, reassign jobs and change production order of panels (by plan or layout), sticks (by panel), or all sticks (about managing plans, panels, and sticks) |
|
| Panels | ||
| Sticks | ||
| Jobs | view panels by job, reassign a panel to another job | |
| Duplicates | set which panels to produce when duplicates occur | |
| Rework | manage jobs for panels that must be redone | |
| Stacks | (for Nexa Pro customers) manage stacks for delivery |
Adding and managing files in a project
Use the Files screen to add or remove design files or other files (e.g., images, spreadsheets, etc.).
In the project navigation pane, click Files to open the Files screen. 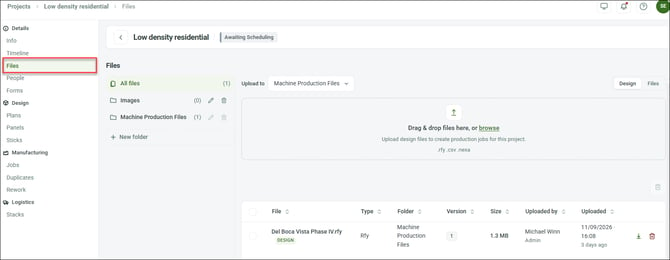
To add a .csv, .nexa, or .rfy file, click Design and select Upload to Machine Production Files folder.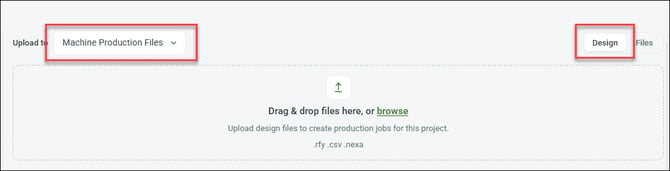
To add other files (e.g., .jpg, .xlsx, etc.), click Files and select Upload to a folder (other than Machine Production files).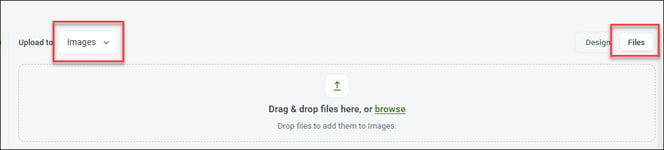
Click a folder name (under Files) to access its files or click New Folder to create one.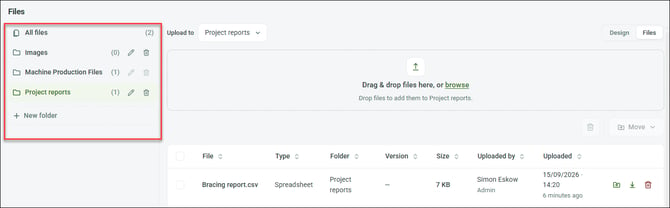
Click the respective icon to rename or delete a folder, or to move, delete, or download a file.
NOTE! You cannot rename or delete the Machine Production Files folder.
Adding a form to a project
Nexa Pro customers can add forms for a user to fill for tracking quality control (QC) or other purposes. Use the Forms screen to add a form from your library (about creating a form) to a project.
TIP! Forms allow users with permissions to access to track quality and other project data at the factory or build site using an Android or iOS device. Admin users can view any filled-out forms in the Forms screen of the project's page.
In the project navigation pane, click Forms, then click Add form.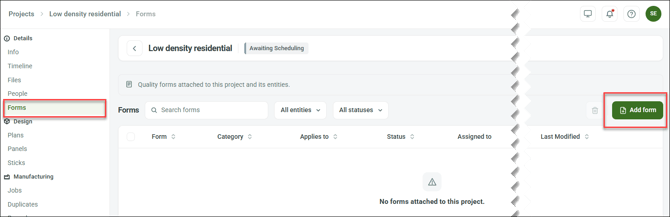
In the Add form dialog, select a form, (optional) assign a user, and click Add form.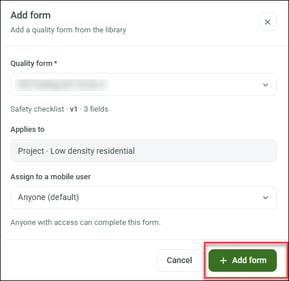
Creating a form
Nexa Pro customers can create a form in Nexa by placing fields on the .pdf of an existing form. Use the Settings module to create the form.
Click Settings in the sidebar, click Form library (under Forms), then click New Form.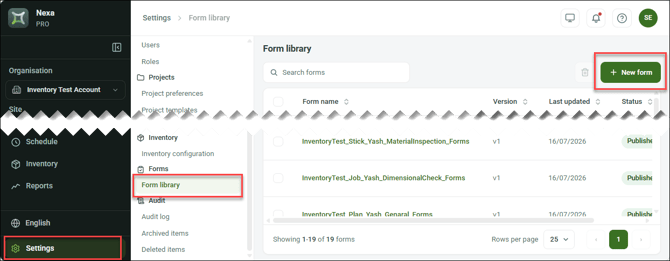
In the New form screen, click Choose PDF to upload a form, then enter form details.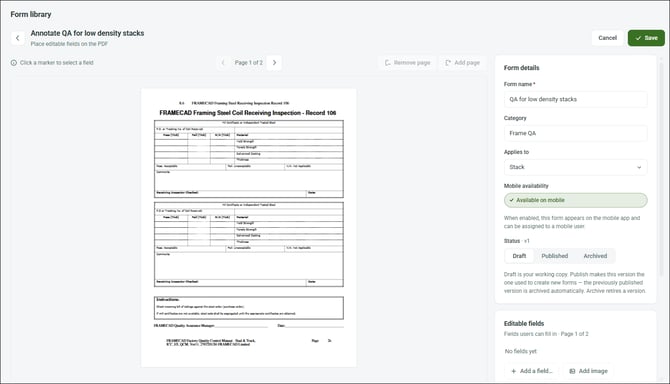
Click Available on mobile (if applicable) and select where to apply the form.
| Apply to... | To allow... |
| Inventory |
Admin, NexaAppUser or custom roles with Complete coil quality forms permission to fill out the form |
| Panel | Admin or custom roles with Manage project quality forms to fill out this form |
| Stack | |
| Plan | |
| Production Job | |
| Project | |
| Stick |
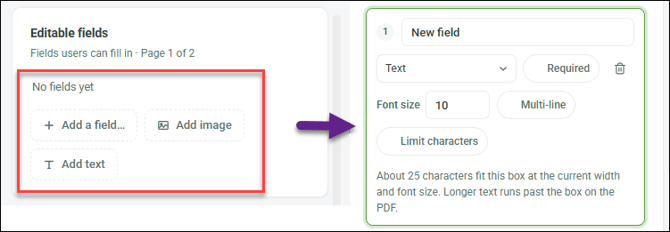
Start adding fields: under Editable fields click Add a field, Add image, or Add text, then enter field name, select Required (if mandatory), and enter other settings.
| Field type | Info |
| Checkbox | User can select and de-select a checkbox when filling out the form |
| Date |
User can pick a date when filling out the form |
|
Dropdown |
Enter dropdown options; user can select an option when filling out the form |
| Image | User can upload or take a photo with their device when filling out the form |
| Radio | Create a group and add two or more radio buttons; user can select one button in group |
| Signature | Click Include signer details to insert user name and date with signature |
| Static text | Displays specified text |
| Text | Set a font size, click Limit characters to set a maximum, and click Multi-line to allow user to enter separate lines when filling out the form |
Drag and drop to place a field in the form or use Selected field position to move and resize a field.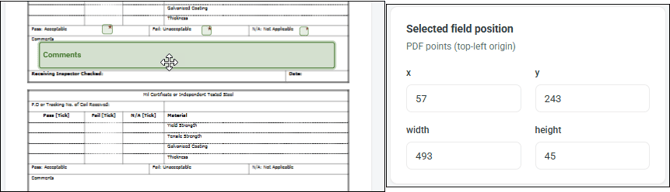
Click Save when ready.
About the Plans, Panels, and Sticks sections
Use the Plans, Panels, and Sticks sections (under Design) to view items and apply settings in different ways. Use the 3D model to access a specific panel. Use the grid to access item(s) or to apply actions to selected items. 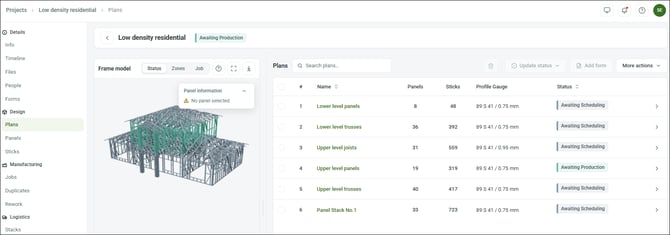
| Section | Actions include... |
| Plans |
Update status, add form, add to job, manage zones for all panels in selected layout(s) |
| View plan (i.e., layout) and view/access panels that belong to that plan. | |
| Panels |
Update status of all sticks in and add forms to panel(s) |
|
Add panel(s) to a job or (Nexa Pro customers only) a stack |
|
|
Manage zones, set workflow, view panel drawing (i.e., elevation view) and view/access sticks in |
|
| Sticks | Add form to selected sticks, separate a stick from a panel, mark a stick for rework |
Accessing a panel from the 3D model
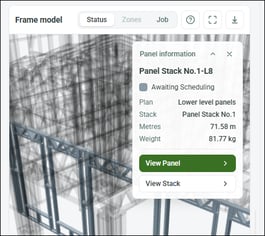
Use the interactive 3D model to view and access panels in context. Click Status, Zone, or Job to render the model by the selected filter.
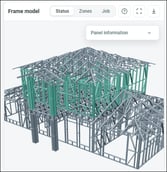
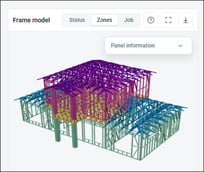
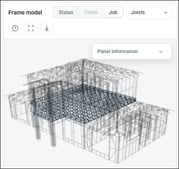
Click a panel then click View Panel to access its page and change the order of stick production. (For Nexa Pro customers only) click View Stack to view the pane's assigned stack.
Accessing a panel from a plan
In the Plans section, click a name in the grid to access a plan's page.
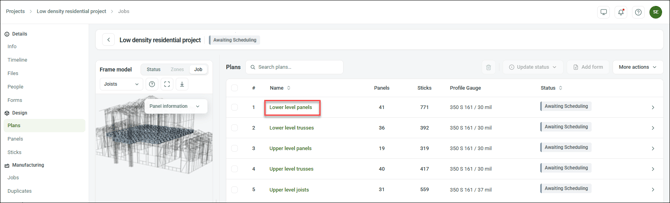
A plan's page includes an interactive drawing (i.e., layout), an Info tab, and a Panels tab. To access a panel's page, click a panel in the drawing then click View Panel or click a panel ID in the Panels tab.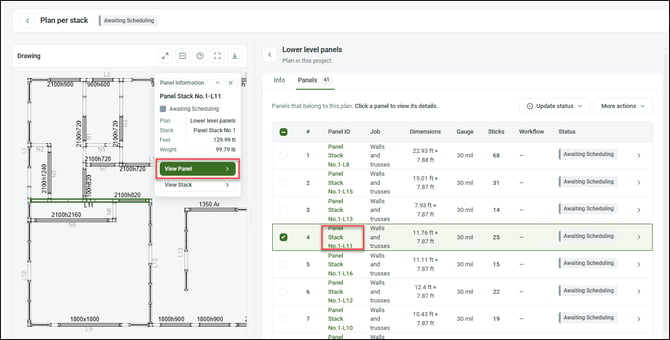
Viewing a panel and its sticks
In the Panels section, click a panel ID to access the panel's page (or access via the 3D model or a plan).
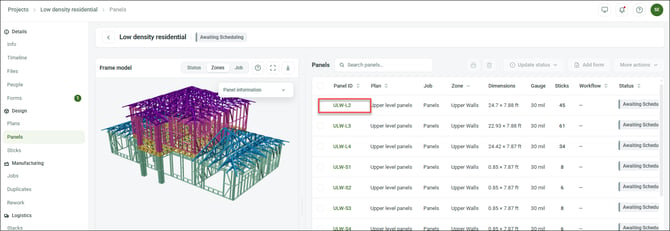
A panel's page includes an interactive drawing (i.e., its elevation view), an Info tab, and Sticks tab. To access a stick, click a stick in the drawing then click View Stick or click a stick ID in the Sticks tab.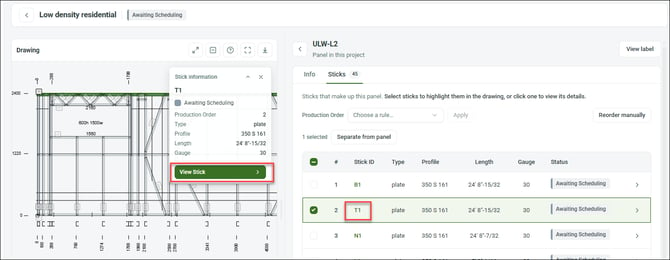
Moving panels to a new or existing job
Nexa automatically creates a job from the design file(s) you add to a project (based on the material thickness and profile shape used). You can move panels between Nexa-created jobs or to a job you create. (You can also reassign a panel in a job page.)
To move panels, in the project navigation pane click:
| Plans | to move all the panels in selected plan(s) to another job |
|
Panels |
to move one or more panels to another job |
In the Plans or Panels grid, select the item(s) to move.
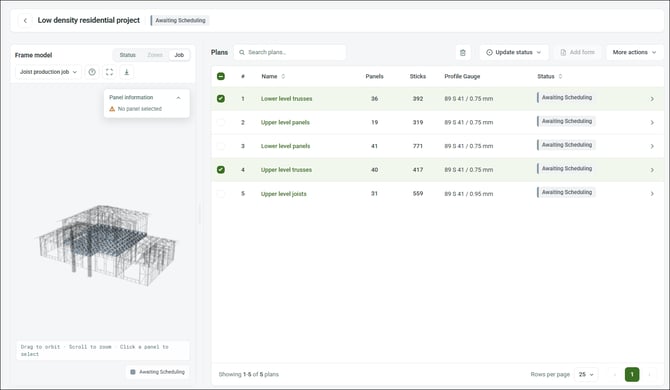
Click More actions (at top right of grid) and click Add to job.
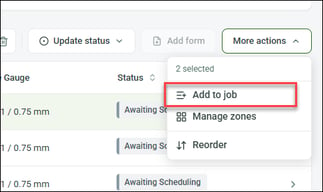
In the Add to job dialog, click Move to an existing job, select a job and click Add, or click Create a new job, name the job, and click Create & add.
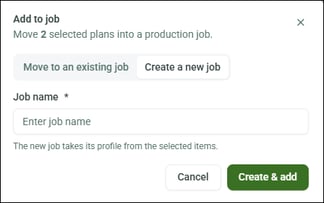
Reassigning a panel (via Jobs)
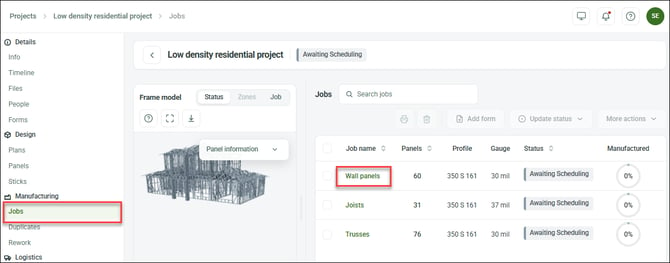
In the project navigation pane, click Jobs (under Manufacturing) then click a job name (in the grid) to access its page.
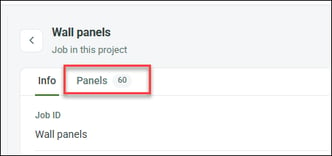
In the job's page, click Panels.
In the Panels tab, select a job in the Reassign dropdown for a panel.
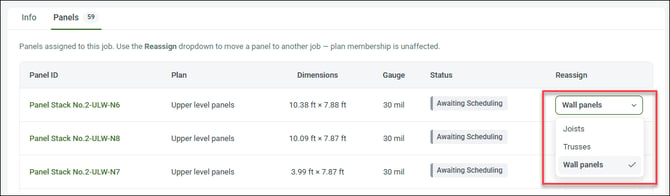
Changing the order of stick production for a panel
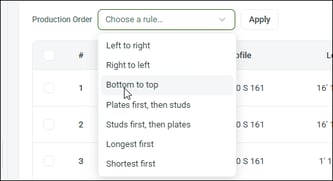
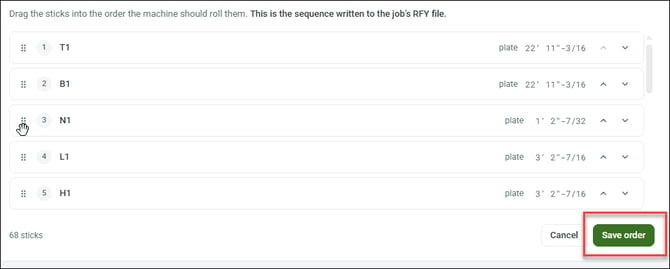
You can change the order in which sticks will be produced by applying a rule or by manually reordering sticks. To change the order, access a panel's page via the 3D model, Plans, or Panels, then click Sticks.
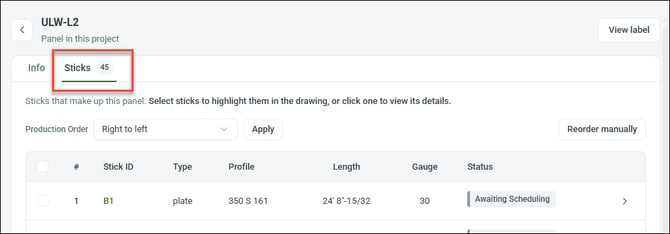
To apply a rule, select a Production Order option then click Apply.
To move individual sticks, click Reorder manually, move stick(s) up or down the grid as required, then click Save order.
Resolving duplicate panels
Nexa will prompt you to decide which panels to keep when it detects duplicates in a design file you have just added. To access the Resolve duplicate panels screen immediately, click Resolve duplicates when prompted.
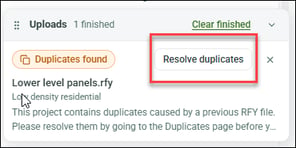
Or, to access the Resolve duplicate panels screen any time before production, click Duplicates (under Manufacturing), then click Resolve duplicates.
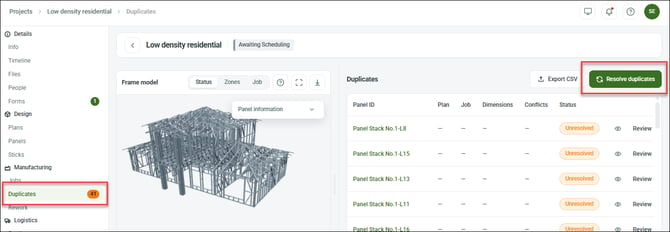
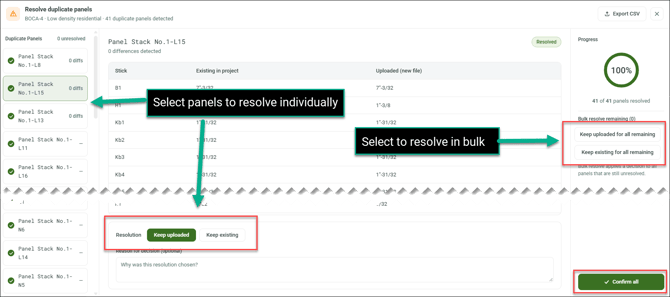
Use the Resolve duplicate panels screen to view differences and decide which duplicate to keep.
To resolve a single panel, click Keep uploaded or Keep existing. To resolve panels in bulk, click Keep uploaded for all remaining or Keep existing for all remaining. Click the Resolve/Confirm all button as needed.
Viewing, removing, and renaming a job and enabling repeats
Use the Jobs section to view and rename a job, and to enable repeats.
Click Jobs in the project navigation pane. Select a job in the grid and click the trash icon to remove it. (For creating a job, see moving panel(s) to a new or existing job).
To access a job, click its name in the grid.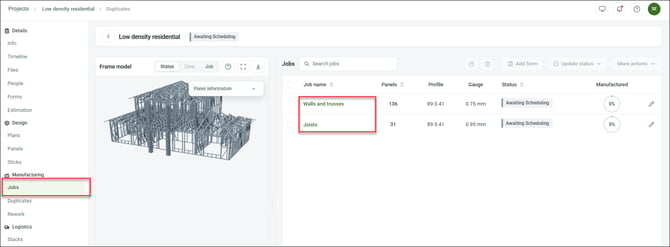
The job page opens on the Info tab. Click the pencil icon to rename the job. Click Enable repeats to set the number of times a machine will repeat the job when you schedule it.
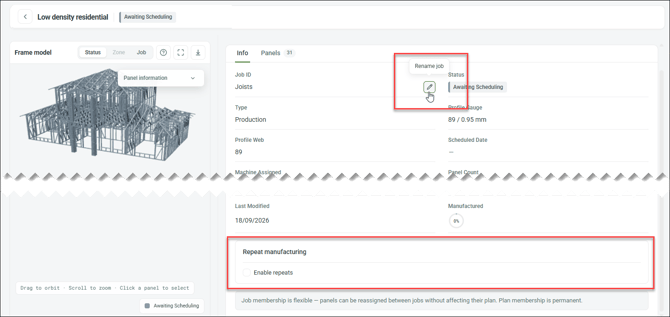
NOTE! You can also set a job to repeat when you add it to a machine in the Schedule module (see Managing production jobs).