
Customers using Nexa Base or Nexa Pro can create and manage projects in the web app.
A project allows you to prepare for the production, assembly, and delivery of CFS/LGS frames to a site for installation. Use a project's page to upload design files, assign people and workflows, view 3D models, prepare for production and prepare for packing and deliver (i.e., stacking).
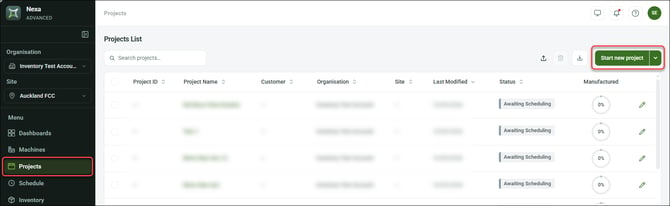
Click Projects in the sidebar to open the Projects module.
Starting a new project
In the Projects module, click Start new project.
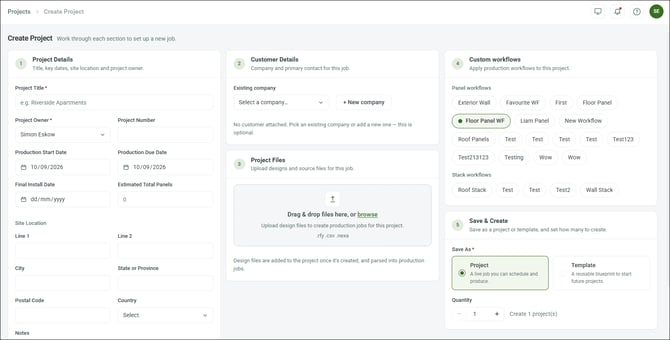
In the Create Project screen, add project details and design files:
| Section | Info | ||||||
| Project Details | Set the Project Title, Project Owner, and other details as needed. Only users with an Admin role can be a project owner (about roles). | ||||||
| Customer Details | Select or create a Company and Primary contact if needed. | ||||||
| Project Files | Upload design file(s) (.csv, .nexa, or .rfy file). Nexa generates production jobs, 3D views, and project totals (i.e., total length of steel required) from design files. You cannot start preparing the project for production until you upload design file(s). You can upload other files later. | ||||||
| Custom workflows |
Select a workflow to be used in the project. Use custom workflows to allow users to track a panel or stack with custom statuses (about creating a workflow). |
||||||
| Save & Create |
*Enter a Quantity to create multiple identical projects. |
Click Create Project when ready.
NOTE! Saving as a template will open the Project template grid in the Settings module.
NOTE! You can start preparing for production as soon as you add design files.
Using Quick Start or starting from a template
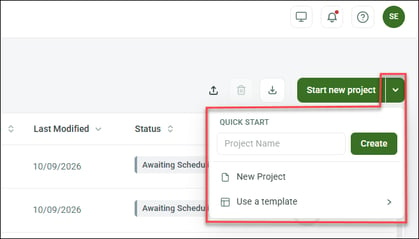
In the Projects module, click the arrow ( ) at Start new project.
| Option | Info |
| QUICK START |
Enter a Project Name and click Create to upload design file(s) immediately. The user that creates the project is the project owner by default. You can change the project owner and add details and workflows at any time. |
| Use a template | Click to select a template to use to create new project(s). |
Uploading design files from Steelwise
Customers can upload design (.rfy) files directly from Steelwise to an existing Nexa project (about uploading from Steelwise to Nexa).
Importing projects (creating projects in bulk)
You can import file(s) that have project and customer details (i.e., project name, customer name, start date, etc.). This allows you to create multiple projects in bulk (instead of entering data for each project individually). In the Projects module, click the Import projects icon.
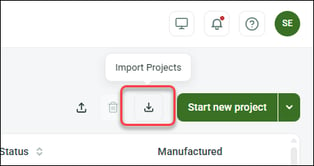
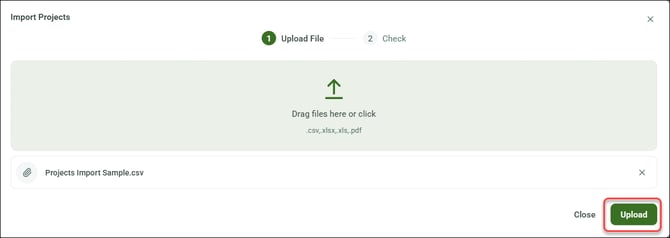
In the Import Projects pop-up, drag or select files (.csv, .xlsx., .xls, or .pdf) and click Upload.
Select project(s) (as identified by Nexa) you want to create, then click Import.
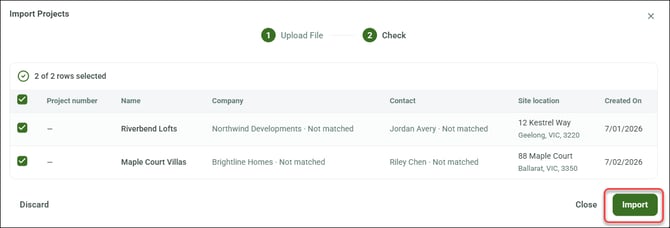
Nexa adds the project(s) to the top of the Projects grid. Click the project's name or its edit icon to change project details and add design files.
Creating a custom workflow
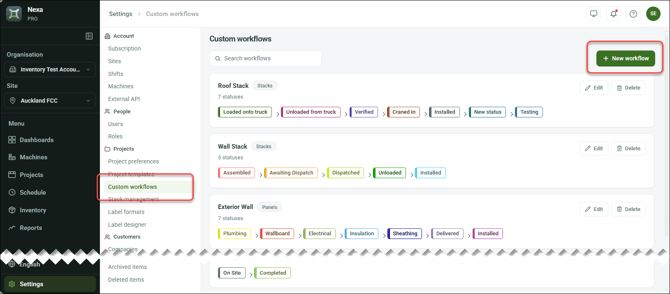
In the Settings module, click Custom workflows (under Projects), then click New workflow.
In the New workflow screen, name and define the workflow.
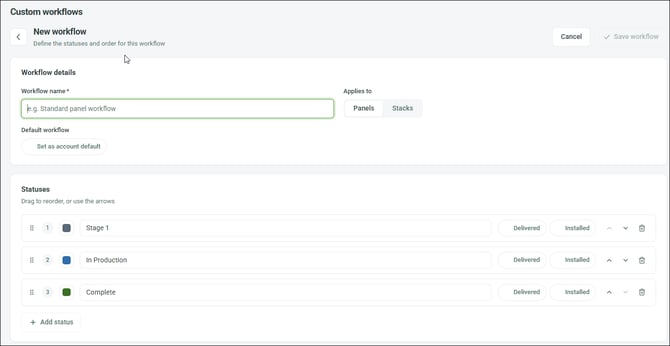
| Settings | Info |
| Workflow details | Enter a title, select Panels or Stacks, and (optional) select Set as account default to automatically apply the workflow to any project started in the current account. |
| Statuses | Add, remove, name/re-name, and re-order statuses as needed. Select Delivered and Installed for the relevant status that marks the delivery and installation of a stack or panel. |
Click Save workflow when ready.