Use the Settings module to add new users, manage existing users, create roles, set units of measurements, build a customer contact database and more.
NOTE! Additional settings are described as required elsewhere in this guide.
NOTE! Only users assigned to the Admin role can manage settings (about roles).
Click Settings in the sidebar to open the settings module.
Adding a new user
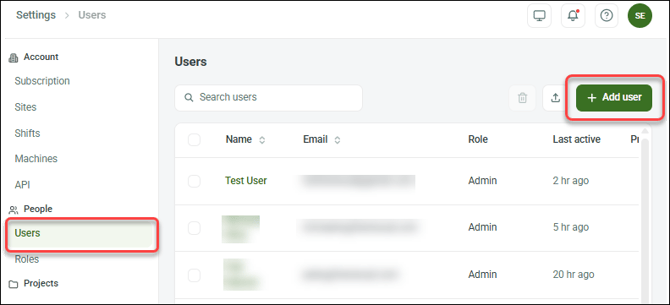
In the Settings module, click Users (under People), then click Add user.
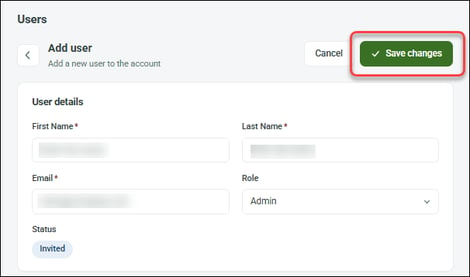
In the Add user screen, enter first and last name, email, role (about roles) and project access (for certain roles) then click Save changes.
Nexa emails an invitation (prompting the user to set a password) and adds the user to the Users grid.
NOTE! If you manage more than one organisation, you must invite a user to each organisation you want them to have access to.
About roles
You can assign a user to one of three system-defined roles or any available custom role (about creating a role). A role determines what a user can do in Nexa. System-defined roles include:
| Role | Permissions |
| Admin |
Access mobile app and web, view and use all modules, assign projects |
| NexaAppUser |
Access mobile app only, view assigned projects projects only, update status (for job, plan or panel), print labels, and (for Nexa Pro only) manage stacks and manage inventory |
| Delivery | Access mobile app only, view assigned projects only |
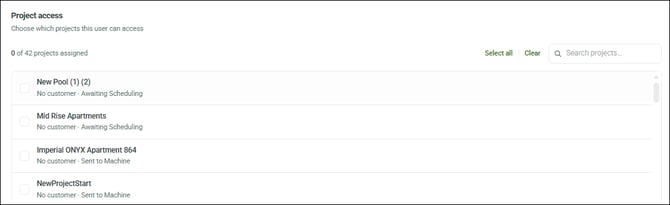
Nexa allows you to specify the project(s) a NexaAppUser or Delivery user can access (when you add or update a user).
Updating a current user
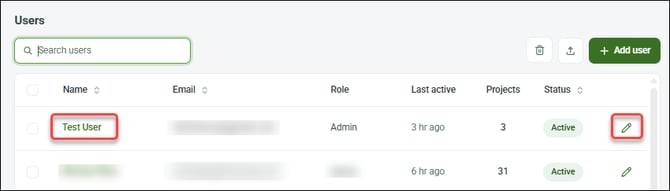
In the Settings module, click Users. The Users grid appears, showing all users invited or added to the account with their status (i.e., Invited, Active, or Disabled). To update a user, click the user's name or edit icon.
In the Edit user screen, make changes as required, then click Save changes or click Disable user* to revoke the user's access to the current account.
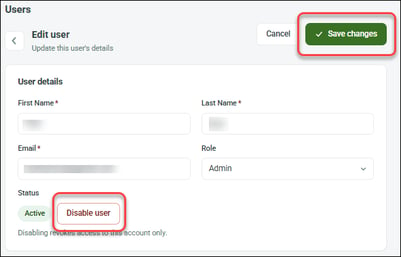
*NOTE! Disabling a user does not revoke access to any other account. You can restore the user's access to the current account by clicking Enable user in the Edit user screen.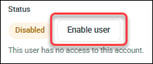
Creating a role
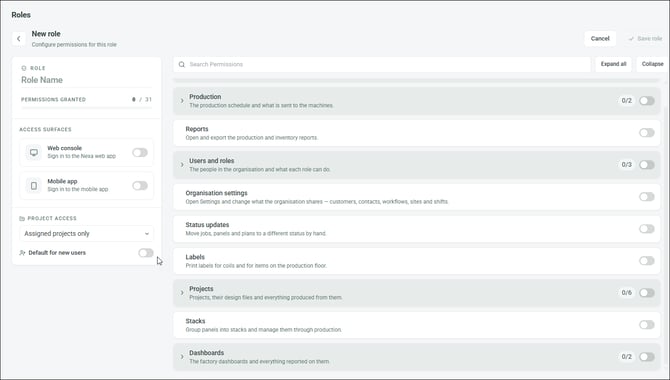
You can create a custom role by defining its level of access and permissions. In the Settings module, click Roles (under people), then click New Role.
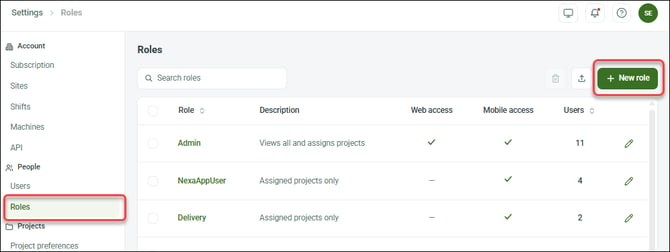
In the New role screen, set its name, access and permissions:
|
Section |
Info |
||||||||||
| Role | Click Role Name to give the role a title. | ||||||||||
| Access Surfaces | Select Web console and/or Mobile app. | ||||||||||
| Project Access |
Click an option to determine level of project access
Click Default for new user to automatically assign new users to this role |
||||||||||
| Permissions | Click a toggle ( ) to grant all permissions for a module; click an arrow ( ) to grant all permissions for a module; click an arrow ( )to expand and grant specific permissions. )to expand and grant specific permissions. |
Click Save role when done.
Setting units of measurement for projects
Users with Nexa Standard or Nexa Pro can set the unit of measurement to apply to projects.
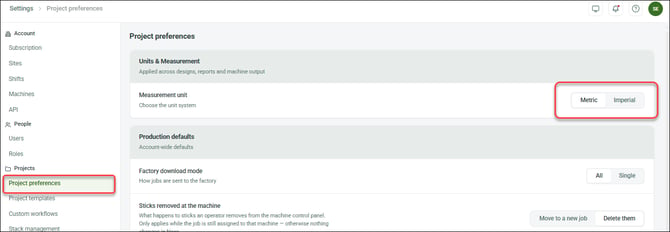
In the Settings module, click Project preferences (under Projects) then click Metric or Imperial for Measurement unit.
Managing customer contacts
You can select or create customer details and contact info when starting or managing a project. Use the Settings module to manage customer and contact details independent of a project.
Adding a new company and primary contact
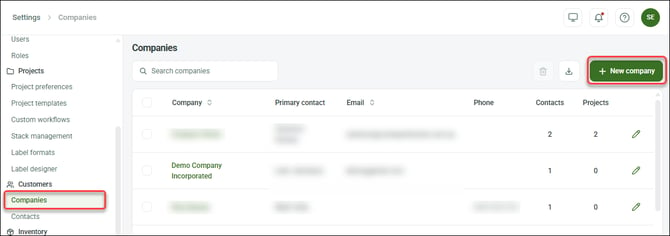
In the Settings module, click Companies, then click New company.
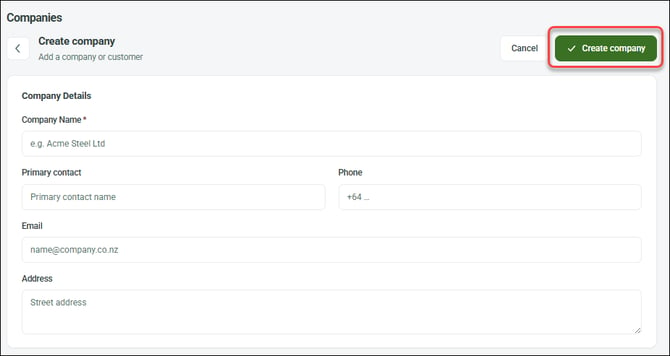
In the Create company screen, enter a company name, (optional) primary contact and other details, as required, then click Create company.
You can now add the company as the customer in a project.
Adding a new contact
NOTE! You can only add a new contact to an existing company. Create the company first, then add contacts.
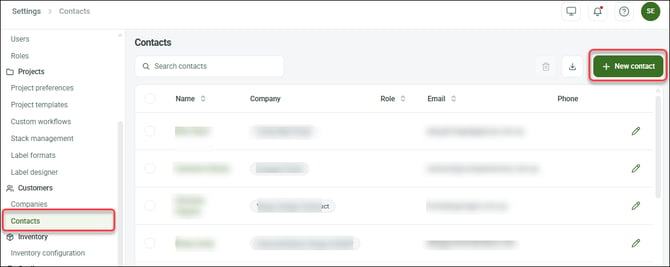
In the Settings module, click Contacts, then click New contact.
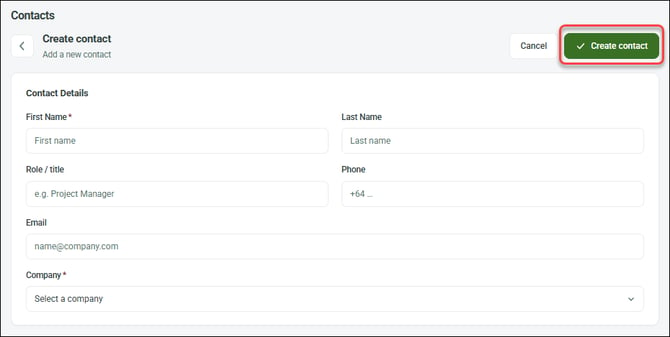
In the Create contact screen, enter a first name, select a company, and (optional) enter any other details, then click Create contact.
You can now select the contact as the primary contact in a project.
Setting up shifts
Customers using Nexa Base or Nexa Pro can set hours for shifts. This is useful for scheduling and managing production jobs for a project.
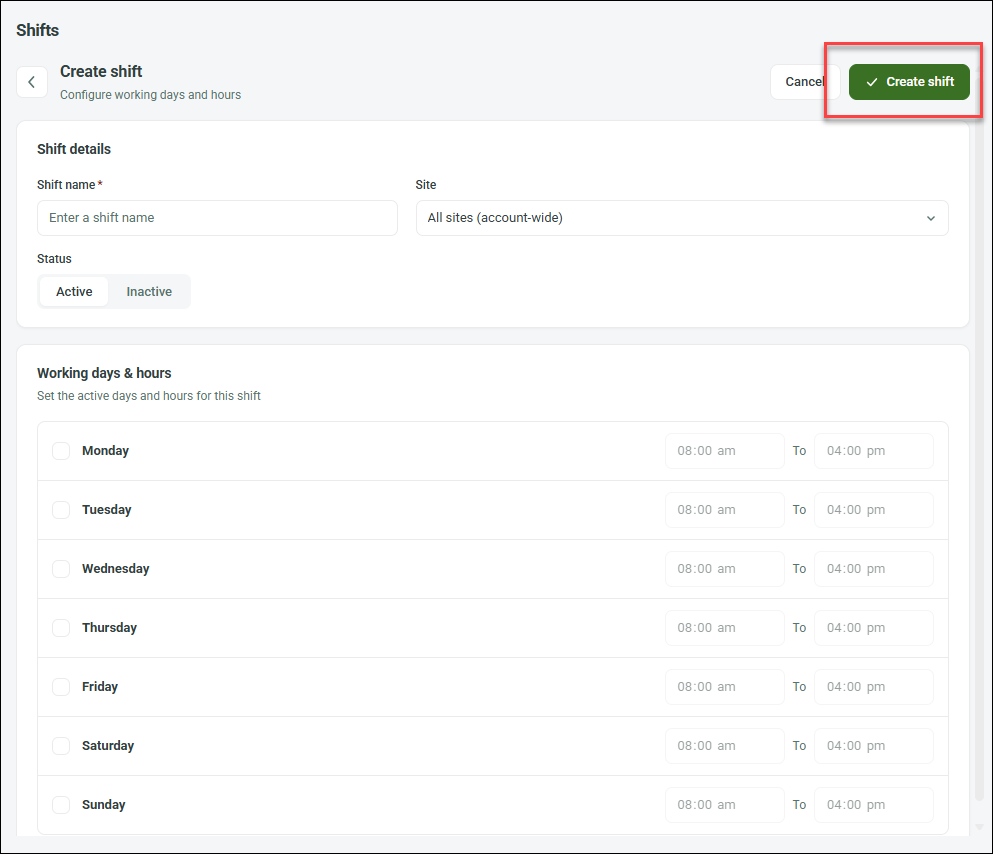
In the Settings module, click Shifts (under Account) then click Add shift.
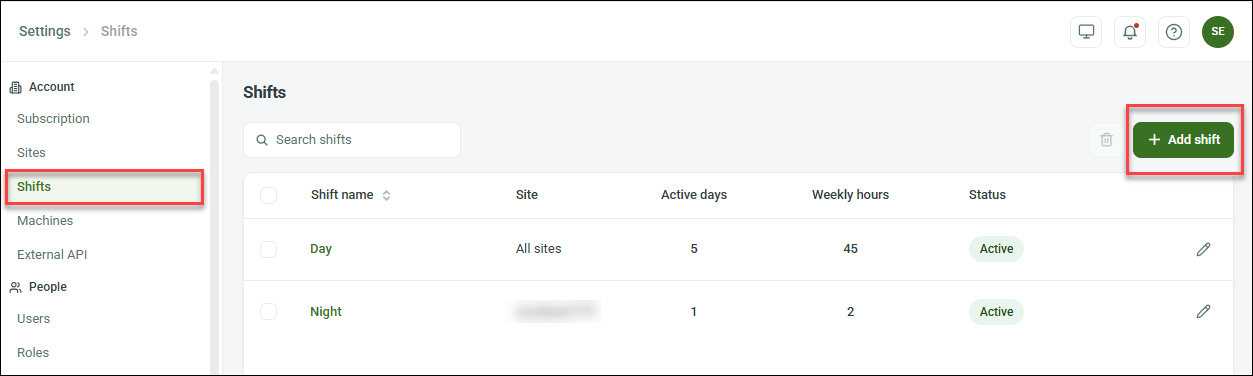
In the Create shift screen, enter a Shift name, select a site or All sites, set the shift's working days and hours, then click Create shift.